Back to Card Play modules
Declarer Play

Hold-up Plays

Now that you understand the idea of dangerous opponents, watch this video to find ways of managing the risks. Test your understanding with the quiz.
Back

Hold-Up Plays

Discover how you can turn one of your opponents into a lamb without resorting to witchcraft.

Question 1/4

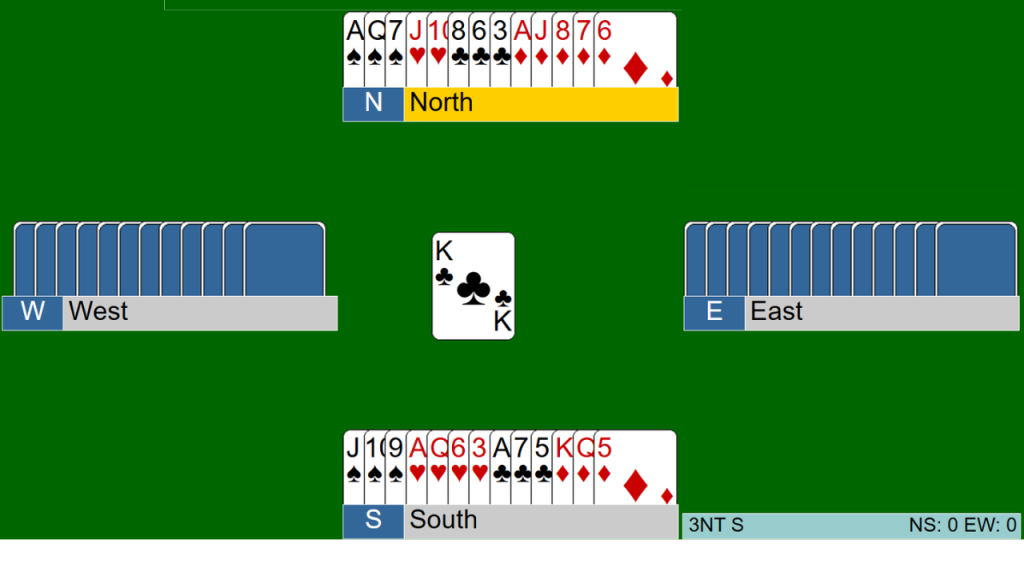
You are playing in 3NT as South. West has led K♣ as their opening lead. Should you win….

You have only 8 tricks: Five diamonds, one club, one spade and one heart. You will be able to establish two more by taking a finesse in hearts or spades because you have the queen, jack and ten in both suits. You have six clubs between your hand and dummy so the defence have seven. If West has five clubs, you could lose four club tricks as well as the potential finesse. If that is the case, then East has two clubs, so they will have run out after the second round. This means that you can win the second club trick knowing that East will have no more clubs to lead when they win a subsequent trick. You turn them into a lamb. If the clubs are 4-3 instead, then you can only lose three tricks in the suit, so all is well.

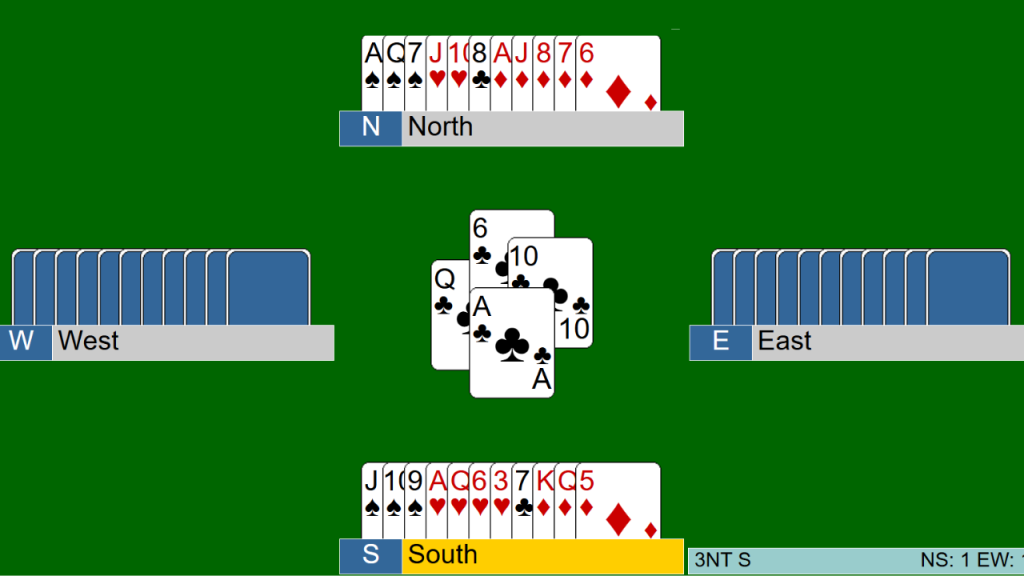
You win the second round of clubs, and now you have to decide which suit to play next. Should you….

Running the ♠J (that is playing the jack, intending to play a small card from dummy if West doesn't play a high card) from your hand means that the only player you can lose to is East. If West plays the king, you play the ace from dummy and now your jack and ten are winners. If West plays low, you play low from dummy and you might lose to East's king, but then either clubs were 4-3, in which case the defence only have one more trick to take, or (the danger scenario) they were 5-2, in which case East has no clubs to lead. East is the safe hand - the 'lamb' this time.

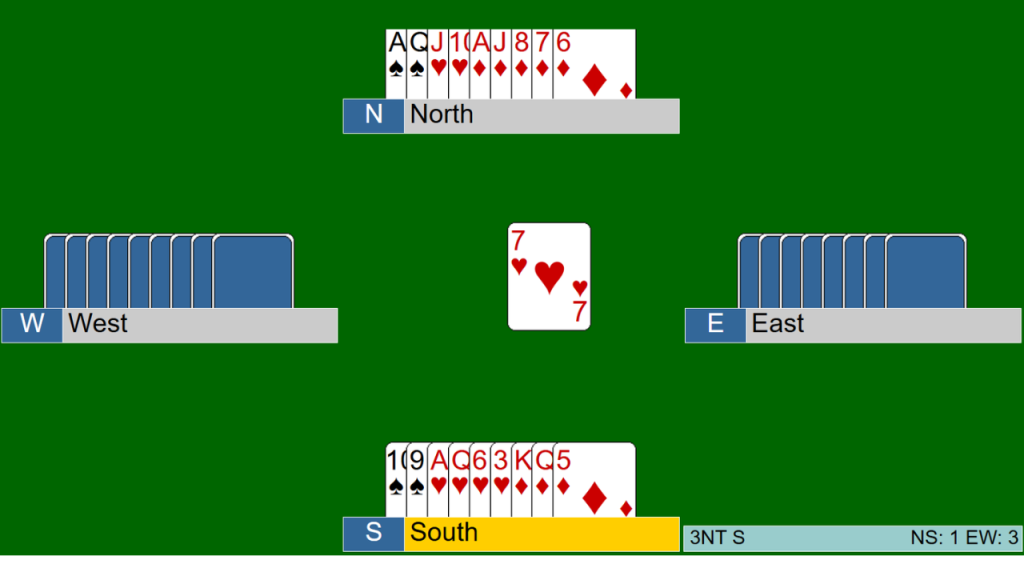
East did have the K♠ , and they won the fourth trick. They play a small heart next. Which heart should you play from your hand?

If you still had control of all the suits you might well play the 3 because if West wins the king your other hearts would all be winners. Here, however you cannot afford to lose the lead to West - they are the danger hand with the club winners to take. You must win the A, cash the king and queen of diamonds, cross to dummy's A, then take your remaining diamond winners and ace and queen of spades to make nine tricks.

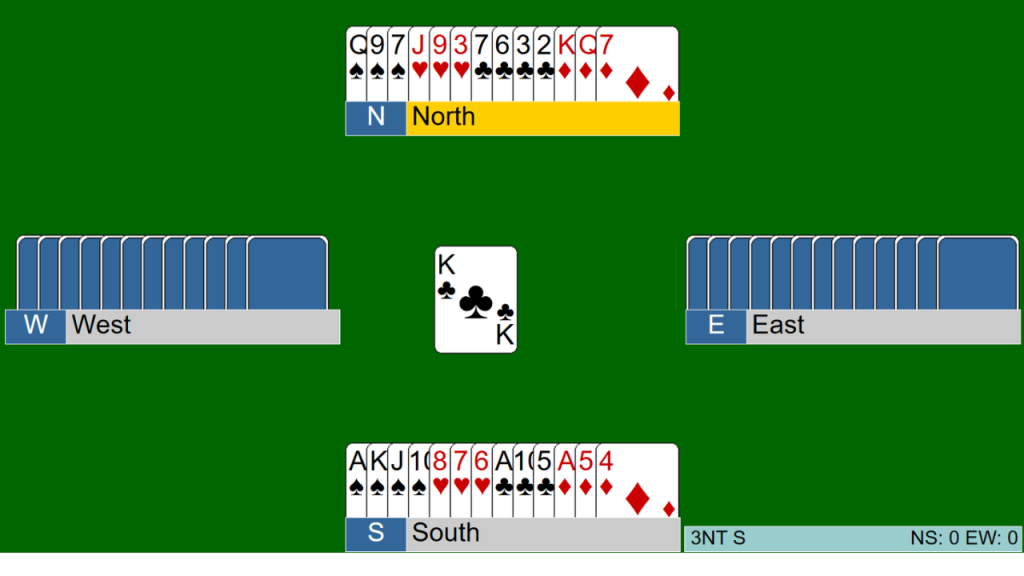
You are declarer, as South, in 2NT. West once again leads K♣ . Should you win this first trick?

It's often a good idea to hold up the ace for the reasons we have outlined, but you need to look at the whole hand, not just do that automatically. If there is another suit where you are vulnerable you should usually not hold up. Look at the heart suit. You have no controls there at all. If you let West win this trick and they switch to a heart, they may well take five heart tricks in addition to the ♣K and defeat your contract right away. You can take the eight tricks you need - ♣A, plus three diamonds and four spades - so you should win the ace and take those tricks right away. Letting your opponents win tricks in order to develop more tricks is often a good play, but not if they can just take the contract off immediately.

These links will take you to Bridge Training, where you can have a go at playing some hands to practice hold-up plays. You won’t need to bid – the trick target and trump suit/NT are displayed in the top left corner, so just have a go and see how many tricks you can make.